
You know that moment at a party when someone pulls a bubbling, cheesy dip out of the oven and suddenly everyone migrates to the snack table like moths to a flame? Yeah, that’s the power of a good bean dip recipe baked to golden, melty perfection. I first made this Classic Bean Dip for a Super Bowl party a few years back, fully expecting it to be one of several snacks on the table — and let me tell you, it was the first thing gone. Like, completely wiped out before halftime. I’ve been making it on repeat ever since, and today I’m finally sharing it with you!
This dip is warm, creamy, cheesy, and packed with that bold, savory flavor that makes tortilla chips basically disappear. It’s layered in a casserole dish, baked until bubbly, and comes together with just a handful of simple ingredients you probably already have in your pantry. Whether you’re hosting a game day party, a backyard get-together, or just a cozy movie night with friends, this baked bean dip feeds a crowd and makes you look like an absolute kitchen superstar. Let’s get into it!
This post contains affiliate links. As an Amazon Associate, I earn from qualifying purchases at no extra cost to you.
Why This Bean Dip Recipe Baked Style Is a Total Game-Changer
Okay, so here’s the thing — cold bean dip is fine. But baked bean dip? That’s a whole different experience. When you layer everything in a casserole dish and pop it in the oven, something magical happens. The cream cheese and sour cream melt into the refried beans, the taco seasoning blooms and deepens, the salsa gets all jammy and rich, and that Mexican cheese on top turns into this gorgeous, golden, stretchy blanket of deliciousness. Every single scoop is warm, layered, and absolutely irresistible. It’s comfort food disguised as party food — and honestly, that’s my favorite kind.
The best part? It takes about 10 minutes to assemble and 25 minutes in the oven. That’s it. You spend more time waiting for it to cool down enough to eat (the hardest part, truly) than you do actually making it.
Ingredients You’ll Need
Nothing fancy here — just good, honest ingredients that work together beautifully. Here’s everything you need to make this crowd-pleasing baked bean dip:
- 2 cans (16 oz each) refried beans — I love using Amazon Grocery Traditional Refried Beans for a quick single batch, or stock up with Old El Paso Traditional Refried Beans (6-pack) so you’re always ready to make this on demand!
- 8 oz cream cheese, softened to room temperature
- 1 cup sour cream
- 1–2 tablespoons taco seasoning — McCormick Premium Taco Seasoning (24 oz, no MSG) is my go-to for everyday batches, or grab the McCormick Original Taco Seasoning 6 lb container if you’re a serious dip-maker (no judgment — I have one too!)
- 1 cup salsa (your favorite store-bought or homemade variety)
- 2 cups shredded Mexican cheese blend, divided
- 1 can (4 oz) fire-roasted green chiles, drained
- Tortilla chips, for serving
What You’ll Need: Kitchen Tools
You don’t need any fancy equipment for this one — just a few kitchen basics to make the process smooth and easy:
- A 9×13-inch casserole dish (or a deep 9×9 for a thicker dip)
- A hand mixer or sturdy spatula for blending the cream cheese and sour cream
- A large mixing bowl
- A rubber spatula for spreading the layers evenly
- Aluminum foil (for covering during the first part of baking)
- An oven mitt — because this comes out HOT and bubbly and you don’t want to find that out the hard way!
Step-by-Step Instructions for the Best Baked Bean Dip
Ready to make something incredible? Here we go — this is so straightforward you’ll have it memorized by the second time you make it (and trust me, there will be a second time).
- Preheat your oven to 350°F. Lightly grease your casserole dish with a little cooking spray or butter so nothing sticks to the sides.
- Mix the creamy base. In a large mixing bowl, beat together the softened cream cheese and sour cream until smooth and fluffy. Stir in the taco seasoning until fully combined. This layer is what makes the whole dip so rich and dreamy — don’t skip it!
- Spread the refried beans. Spoon the refried beans into the bottom of your prepared casserole dish and spread them out into an even layer. This is your hearty, satisfying base.
- Add the cream cheese layer. Dollop the cream cheese and sour cream mixture over the beans and gently spread it into an even layer. Take your time here — a rubber spatula makes this so much easier.
- Spread the salsa. Spoon your salsa over the cream cheese layer and spread it evenly. The salsa adds a bright, tangy kick that balances all that richness perfectly.
- Add the fire-roasted green chiles. Scatter your drained fire-roasted green chiles over the salsa layer. These little guys add such amazing smoky depth — don’t skip them if you can help it!
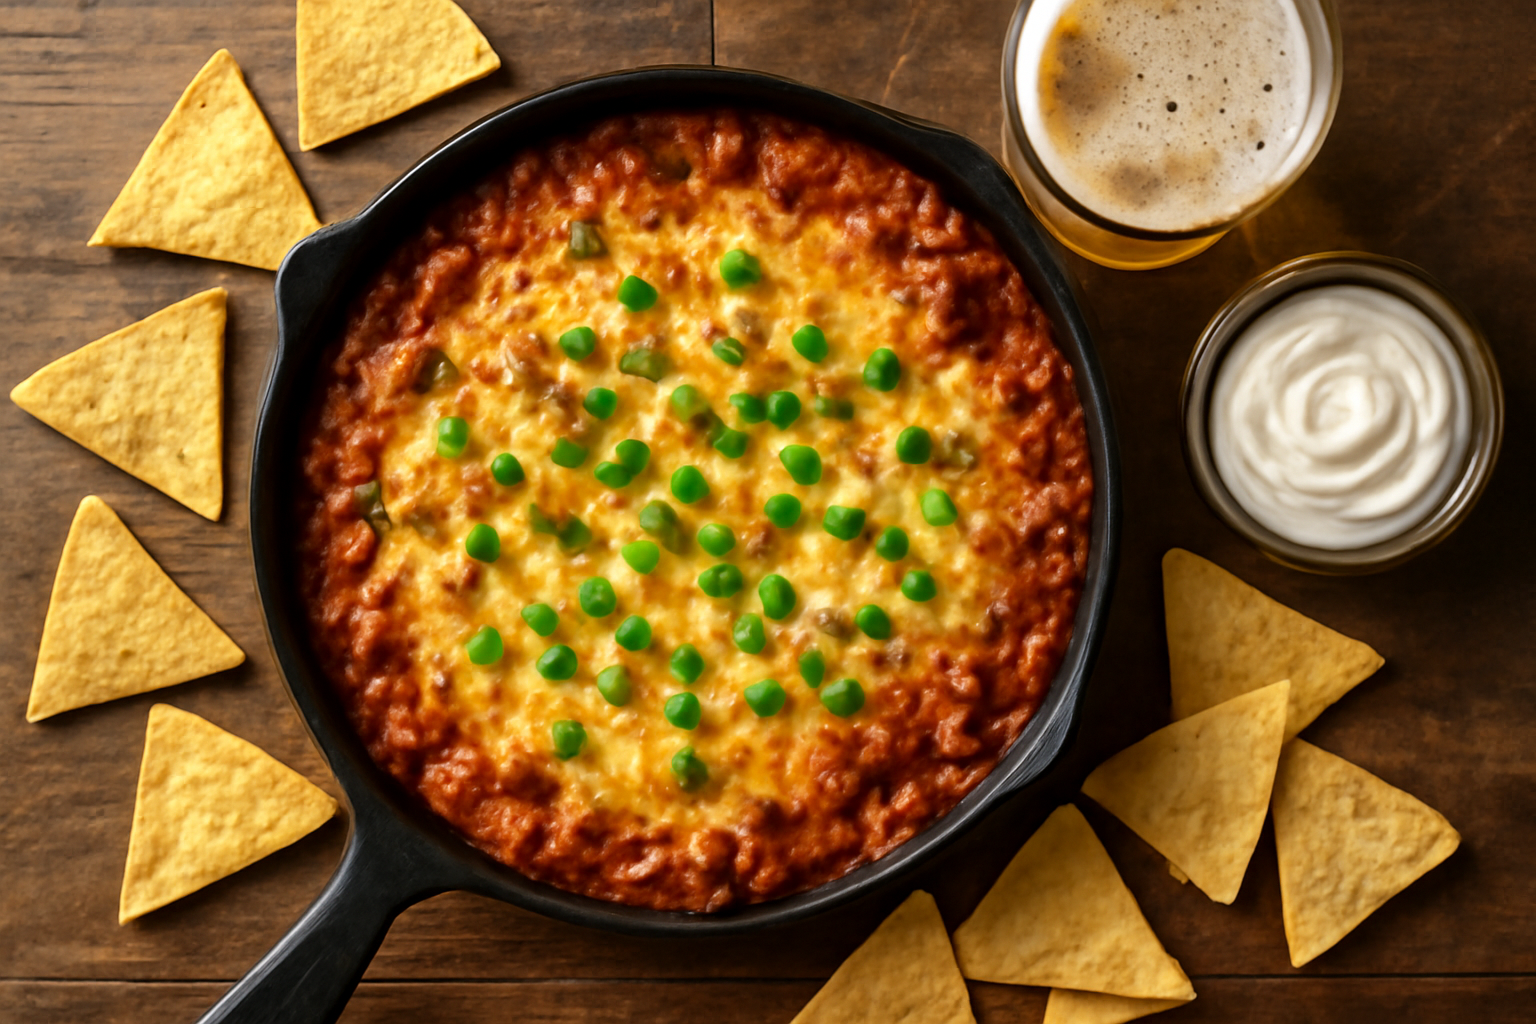
- Top with cheese. Sprinkle 1½ cups of the shredded Mexican cheese blend evenly over the top. Save the remaining ½ cup for later.
- Bake covered. Cover the dish with aluminum foil and bake at 350°F for 20 minutes. This lets everything heat through and meld together without drying out the top.
- Uncover and finish baking. Remove the foil, sprinkle the remaining ½ cup of cheese over the top, and bake uncovered for another 5–8 minutes until the cheese is melted, bubbly, and just starting to turn golden at the edges. If you want a little extra color on top, pop it under the broiler for 1–2 minutes — just watch it closely!
- Let it rest, then serve. Let the dip sit for about 5 minutes before serving — it’ll be searingly hot straight from the oven. Then set it out with a big bowl of tortilla chips and watch it disappear!
Tips & Tricks: Make It Your Own
This recipe is fantastic as written, but it’s also a wonderful canvas for customization. Here are some of my favorite ways to switch it up:
Spice It Up
Love heat? Add a diced jalapeño to the salsa layer, use a spicy salsa, or mix a pinch of cayenne pepper right into the cream cheese base. You can also swap regular green chiles for hot diced green chiles for an extra kick without too much effort.
Add a Protein Boost
Brown some seasoned ground beef or chorizo and layer it right on top of the refried beans before adding the cream cheese mixture. This turns the dip into a seriously hearty dish that could almost be a meal on its own — no complaints here!