For about three years straight, I was a Sabra loyalist. I’d grab two or three tubs every time I went to the grocery store, stack them in the fridge, and call it party prep. It was fast, reliable, and honestly? I didn’t think I could do better. Then, at a gathering in 2016, someone brought homemade hummus. Not from a deli counter, not from a fancy prepared foods section — actually homemade. I ate nearly half the bowl myself and asked for the recipe before I left. That was the last time I bought store-bought hummus.
I’ve since made my homemade hummus recipe hundreds of times. I’ve brought it to Super Bowl parties, holiday spreads, casual Tuesday nights, and baby showers. I’ve tested variations obsessively — dried chickpeas versus canned, tahini brands, ice water versus warm, peeled chickpeas versus unpeeled. I’ve made it in a blender, in a full-size food processor, and in a mini prep. I know this recipe the way I know my own kitchen, and I’m going to tell you everything I’ve learned.
Why Store-Bought Hummus Can’t Compete
I want to be fair here: store-bought hummus is not bad. If you’re in a pinch, a good-quality tub will do the job. But once you understand what’s actually in most commercial hummus — and more importantly, once you taste the difference — it’s hard to go back.
Most store-bought hummus uses citric acid as a preservative, contains less tahini than a traditional recipe calls for, and is formulated to have a long shelf life rather than maximum flavor. A 2021 review of commercial hummus products found that tahini content in popular brands often falls well below the 10–15% range that most classic Lebanese recipes use. That matters because tahini is where a significant portion of the richness and depth comes from. When you cut it, you get something that tastes flat and slightly sour rather than nutty and complex.
Homemade hummus made with quality ingredients tastes completely different. It’s creamier, more flavorful, and you control every element — the garlic level, the lemon brightness, the salt. Once you make it yourself, you’ll understand what everyone has been talking about.
The One Technique That Changed Everything for Me
I spent years making decent homemade hummus. Then I started peeling the chickpeas and everything changed.
I know. It sounds tedious. It is a little tedious. But if you cook your chickpeas from dried (more on that in a moment), the skins slip off easily after cooking and you can get through a batch in about five minutes while watching TV. When you remove the skins, you remove the one thing standing between you and genuinely silky, restaurant-quality hummus. The texture improvement is not subtle — it’s dramatic.
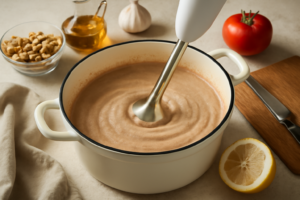
The second technique I swear by is the ice water method. After processing the chickpeas with tahini and garlic, I add ice water — not cold water, actual ice water — a tablespoon at a time while the processor runs. The cold temperature helps emulsify the tahini and creates that light, almost whipped texture that makes people ask you what your secret is. I usually add two to three tablespoons total.
The third thing: process longer than you think you need to. Most people stop at 30 seconds. I run mine for a full two to three minutes, scraping down the sides halfway through. That extended processing time is what takes it from good to exceptional.
Dried Chickpeas vs. Canned: My Honest Take
Canned chickpeas are faster and they work perfectly well for a weeknight batch. I use them all the time when I’m short on time. But dried chickpeas produce a noticeably creamier result, and if you’re making hummus for a party or any occasion where you want it to be genuinely impressive, dried is the move.
The method I use: soak the dried chickpeas overnight in cold water with a pinch of baking soda, then cook them the next day until they’re very soft — softer than you’d cook them for a salad or soup. You want them to mash easily between your fingers. Undercooked chickpeas are the number one reason homemade hummus turns out grainy.
For dried chickpeas, I’ve been using Yupik Organic Raw Chickpeas for the last couple of years. They’re USDA certified organic, non-GMO, and they cook evenly and consistently. A 2.2-pound bag gives me enough for multiple batches, and the quality is noticeably better than what I used to grab off the bulk bins at the grocery store.
My Go-To Homemade Hummus Recipe
This is the version I’ve landed on after years of testing. It makes a generous party-size bowl and takes about 15 minutes of active work if you’re using canned chickpeas.
- 2 cups cooked chickpeas (from dried, or one 15 oz can, drained and rinsed — reserve the liquid if using canned)
- 1/3 cup good-quality tahini (I use Soom or Seed + Mill — brand matters here)
- 3 tablespoons fresh lemon juice (about one large lemon)
- 1 clove garlic, roughly chopped (start with one, add more if you like a stronger garlic flavor)
- 3/4 teaspoon kosher salt
- 2–3 tablespoons ice water
- 2 tablespoons good olive oil, plus more for serving
Instructions: Add the garlic and lemon juice to the food processor and pulse a few times. Let it sit for five minutes — this takes the raw edge off the garlic without cooking it. Add the tahini and process for one minute until it lightens in color. Add the chickpeas, salt, and olive oil, and process for another two minutes. With the machine running, add ice water one tablespoon at a time until the texture is smooth and creamy. Taste and adjust salt and lemon. Transfer to a bowl, make a shallow well in the center, drizzle with olive oil, and finish with smoked paprika, a few whole chickpeas, or fresh herbs.
What I Use to Make It
The right equipment makes a real difference with hummus. Here’s what I reach for depending on the batch size.
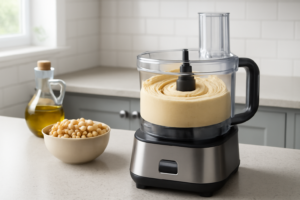
For small batches and quick weeknight hummus, the Cuisinart Mini-Prep Plus Food Processor is exactly what I need. The 24-ounce work bowl is the right size for a single batch, the reversible stainless steel blade handles the job well, and cleanup is genuinely fast. I’ve had mine for years and it still performs like new. For a casual weeknight batch, it’s my first reach.
When I’m making hummus for a party — or doubling the recipe for a big spread — I use the Ninja Food Processor Professional Plus. The 1000 peak watts and 9-cup bowl mean I can process a large batch without stopping to scrape every 20 seconds, and the power shows in the final texture. If you’re serious about making hummus regularly — and cooking for groups — a processor with real wattage is worth it.
One Honest Caveat
I want to be straight with you: homemade hummus does not last as long as the store-bought version. Without preservatives, you’re looking at four to five days in the refrigerator, tightly covered. It also thickens as it sits, so I always drizzle a little extra olive oil over the top before storing and stir it back in before serving. If you’re making it for a party, same-day or the day before is ideal. It will taste noticeably better fresh, and the texture will be at its best within the first 24 hours.
This post contains affiliate links. As an Amazon Associate I earn from qualifying purchases.
The Bottom Line
I’ve been the person who shows up with a dip for over a decade, and this homemade hummus recipe is one of the things I’m most proud to put in front of people. It’s genuinely better than anything I can buy — creamier, more flavorful, and completely customizable. The techniques aren’t complicated once you know them, and the ingredients are simple. You just have to be willing to do it once and see for yourself.
If you’ve been relying on store-bought hummus because you assumed homemade wasn’t worth the effort, I’d genuinely encourage you to give this recipe one try. I’m willing to bet it becomes a regular part of your rotation — just like it did mine.