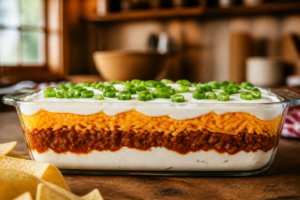
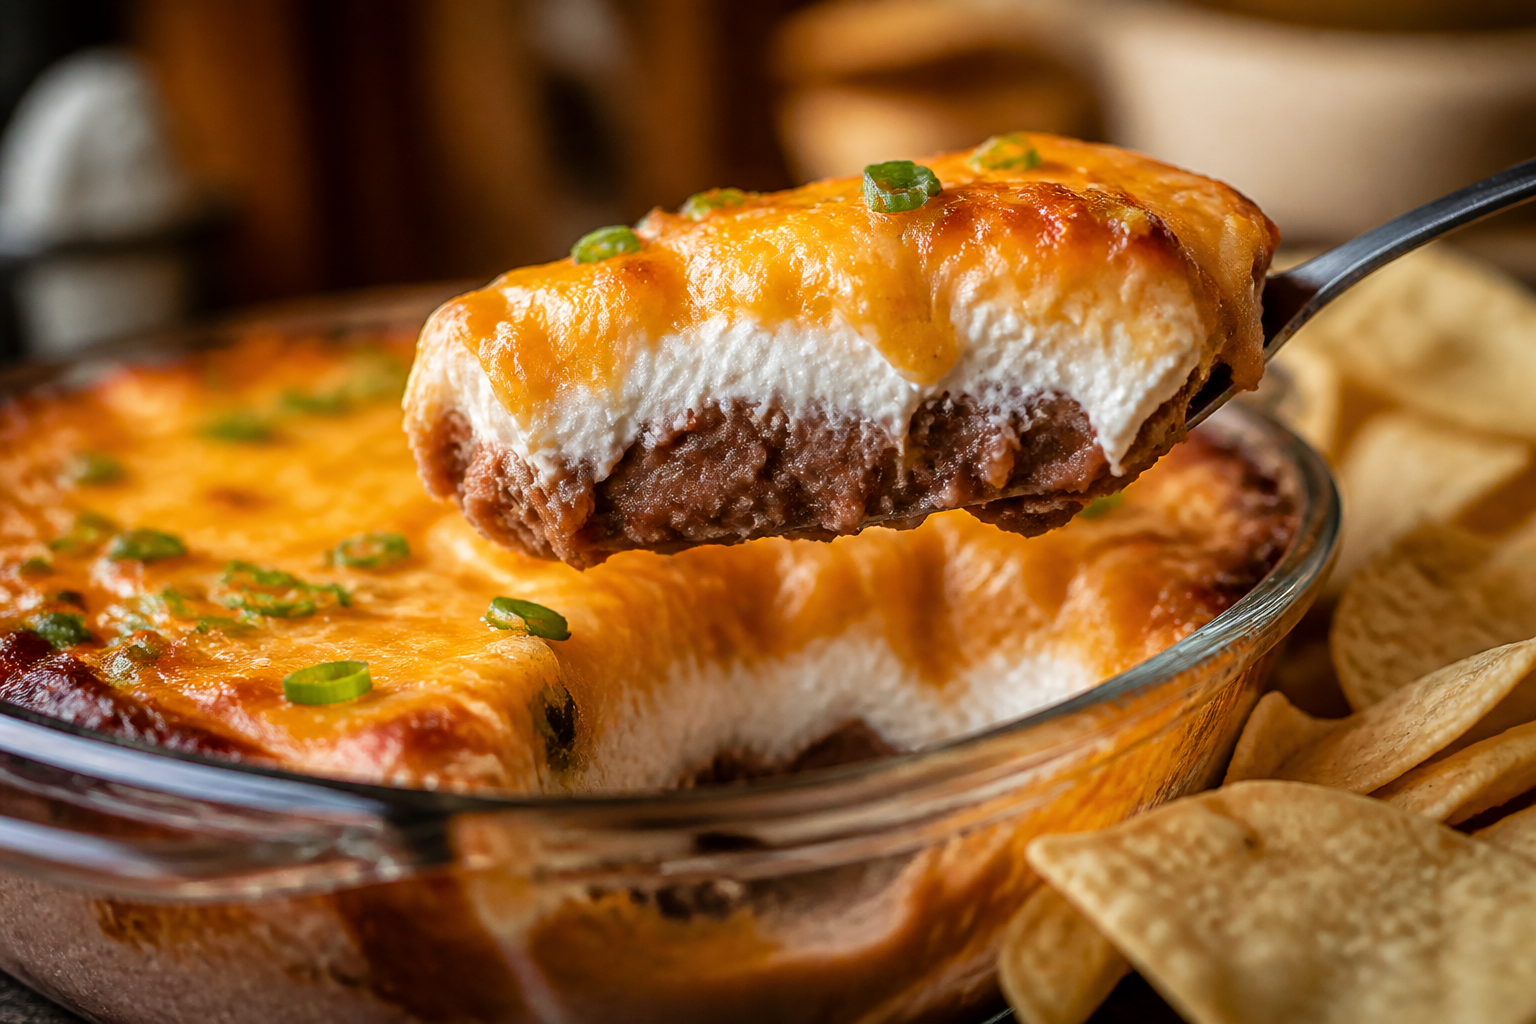

The difference between a bean dip that is beige and a bean dip that people photograph is whether you can still see the layers when the spoon goes in. Stirring everything together is faster and always worse. A baked bean dip with cream cheese and sour cream layers should come out of the oven looking like a cross-section of soil—distinct bands of color and texture that stay visible all the way through. This layered baked bean dip is hot, molten in the middle, and tastes like three different things in one scoop instead of one homogenized beige situation.
If you’ve made a cold seven-layer dip before, this is the opposite energy. That’s sour cream on top, room temperature, assembled right before serving. This is the baked version where the dairy layer goes inside, gets surrounded by heat, and comes out of the oven melted and molten. It’s why your guests will hover over the dish instead of grabbing a chip and walking away.
Why Layering Beats Stirring Every Single Time
I understand the temptation to dump everything into a bowl and call it done. It’s one step. But a stirred dip homogenizes into one flavor and one color, and you lose the whole point of adding three different components.
When you keep the layers distinct, each one keeps its own texture and seasoning. One scoop gives you creamy beans, then tangy cream cheese and sour cream, then browned melted cheese on top. Your palate gets contrast.
There’s also a technical reason to layer: the dairy layer in the middle insulates the beans from the oven’s direct heat. If you stir the sour cream into the beans before baking, you end up with a crust forming on top while the center stays soft, or worse, the whole thing dries out. The cream cheese layer acts as a buffer, keeping the bottom layer creamy and spreadable even after 25 minutes at 350°F.
The Three Layers and What Each One Does
Bottom layer: Refried beans loosened with salsa and warmed spices. This layer must be spreadable but not runny. You’re going for the texture of thick frosting—something that holds its shape but spreads smoothly under a spatula.
Middle layer: Cream cheese beaten with sour cream and taco seasoning. This is the insulation layer and also the flavor moment. It has to hold its shape while the oven does its work, which is why the technique here matters more than anywhere else in the recipe.
Top layer: Shredded cheese, browned and bubbly. Use a blend of sharp cheddar and Monterey Jack, or a true Mexican blend from the block, not the pre-shredded bag with the anti-caking powder. Grate it fresh. The difference is visible.
The Technique That Keeps the Layers From Bleeding Together
This is where the layered baked bean dip separates from the failures. The middle layer has to stay distinct, which means it has to be firm enough to not sink into the beans and loose enough to spread without tearing. Here’s exactly how to get there:
- Beat the cream cheese completely smooth before adding sour cream. If there are any lumps, they will collapse during baking and break the layer. Room-temperature cream cheese takes about 2 minutes with a hand mixer.
- Use full-fat sour cream only. Light sour cream has more water and will weep into the beans layer below. Full-fat stays put.
- Keep the sour cream ratio at or below 1/2 cup per 8 oz of cream cheese. More than that and the middle layer is too loose to hold its shape. It will spread like frosting on a warm cake.
- Chill the assembled dish 20 minutes before it goes in the oven. This lets the dairy layer firm up slightly so it doesn’t shift when heat hits it.
- Drop the middle layer in spoonfuls and spread gently from the center out. Never drag a spatula back through the beans layer. You’re laying it on top, not incorporating it.
- Bake at 350°F, not 400°F. High heat breaks sour cream and makes it grainy and weepy. 350°F gives you 25–30 minutes to heat everything through while the dairy layer stays smooth.
The Full Recipe for Baked Bean Dip With Cream Cheese and Sour Cream Layers
Serves: 10–12 people | Dish size: 8×8 inch or 9-inch round | Baking time: 25–30 minutes at 350°F
For the bean layer:
- Two 16 oz cans refried beans
- 1/3 cup salsa (mild or medium)
- 1 tsp ground cumin
- 1/2 tsp garlic powder
- 1/2 tsp chili powder
- Salt to taste
For the dairy layer:
- 8 oz cream cheese, softened to room temperature
- 1/2 cup full-fat sour cream
- 1 tbsp taco seasoning (or homemade blend)
- 1 tbsp fresh lime juice
For the cheese layer:
- 2 cups shredded sharp cheddar and Monterey Jack, grated fresh from the block
Optional garnishes (added after baking):
- Sliced green onion
- Fresh cilantro
- Diced fresh tomato
- Pickled jalapeño slices
- Sliced black olives
Instructions:
- Preheat oven to 350°F. If using a glass baking dish like this CGNWEEPS 8×8 inch square glass baking dish, you’ll get perfect visibility of those layers.
- In a medium bowl, combine both cans of refried beans with salsa, cumin, garlic powder, chili powder, and a pinch of salt. Stir until smooth and spreadable. Taste and adjust seasoning. Spread evenly into the bottom of your baking dish in an even layer. This is your base.
- In another bowl, beat the softened cream cheese with an electric mixer on medium speed for about 2 minutes until completely smooth and light. Scrape the sides.
- Add the sour cream, taco seasoning, and lime juice to the cream cheese. Beat on low speed until just combined. Do not overmix. The texture should be creamy and spreadable, not deflated.
- Using a spoon or small offset spatula, drop the cream cheese mixture in 6–8 dollops evenly across the bean layer. Gently spread from the center outward, being careful not to drag the spatula down into the beans. The goal is to lay it on top, not incorporate it. A few swirls and irregularities are fine and actually look better.
- Distribute the shredded cheese evenly over the dairy layer. Don’t press down.
- Cover the dish loosely with plastic wrap or foil and refrigerate for 20 minutes. This is crucial. The cold firms up the dairy layer so it won’t shift in the oven.
- Remove plastic wrap and place dish in the 350°F oven. Bake for 25–30 minutes until the edges are bubbling and the cheese on top is golden brown. The center should be hot when you touch the bottom of the dish with your hand.
- Remove from oven and let rest for 10 minutes before serving. This allows the layers to set slightly so they stay distinct when scooped.
- Add your chosen garnishes just before serving. Never add them before baking, as they will dry out or sink into the cheese.
Why Your Refried Beans Matter
Not all canned refried beans are the same. Some are thin and soupy, which will cause your dairy layer to sink. Look for brands like Amazon Grocery Traditional Refried Beans or the Old El Paso Traditional Refried Beans 6-pack that have a thicker, spreadable consistency straight from the can. When you add the salsa and spices, you’re thinning them slightly, so start with a bean that can handle it.
Troubleshooting Your Baked Bean Dip With Cream Cheese and Sour Cream
| Problem | Cause | Fix |
|---|---|---|
| Layers bled together into one color | Dairy layer was too loose, or dish wasn’t chilled before baking | Use less sour cream next time (max 1/2 cup per 8 oz cream cheese). Always chill for 20 minutes. Make sure cream cheese is fully smooth before adding sour cream. |
| Sour cream layer is grainy and separated | Oven temperature was too high | Use an oven thermometer. Bake at exactly 350°F. Never go above 375°F or the sour cream breaks. |
| Greasy pool on top of the cheese | Pre-shredded cheese or too much cheese used | Grate cheese fresh from the block. Measure carefully: 2 cups is the max for an 8×8 dish. Pre-shredded cheese has anti-caking agents that don’t melt cleanly. |
| Beans dried out and crusty at the edges | Overbaked or the dish was too large and shallow | Start checking at 22 minutes. Don’t bake longer than 30 minutes. If making a half batch, use a smaller dish to keep layer thickness the same. |
| Dip tastes bland | Beans weren’t seasoned enough; canned beans need salt and cumin | Taste the bean layer before spreading it. Canned refried beans are often underseasoned. Add salt and cumin until it tastes like something you want to eat on its own. |
Make-Ahead, Freezer, and Scaling Options
Make-ahead: Assemble the entire dip, cover it with plastic wrap, and refrigerate for up to 24 hours. Bake from cold, adding 10–12 minutes to the baking time (total 35–42 minutes). This is perfect for parties.
Freezing: You can freeze an unbaked assembled dip for up to one month. Thaw completely in the refrigerator overnight before baking. Note: the sour cream layer will be slightly grainier after freezing and thawing, but still delicious. This is worth it for meal prep.
Slow cooker variation: Layer the same way in a small slow cooker (4–5 qt). Cook on LOW for 2 hours, stirring very gently once halfway through to redistribute heat. The top won’t brown, but the dip will be creamy and hot. If you want browning, transfer to an oven-safe dish and broil for 2–3 minutes after cooking.
Scaling for 20–25 people: Use a 9×13 inch pan and make 1.5 times the recipe. Keep the layer thicknesses the same rather than making deeper layers—a deep dip heats unevenly and the edges will overbake while the center stays cool.
Can I use light sour cream instead of full-fat?
I wouldn’t. Light sour cream has more water and will weep into the bean layer during baking, collapsing your layers. Full-fat is essential for the structure of this dip.
What’s the best chip to serve with this dip?
A sturdy restaurant-style or scoop tortilla chip. This is a heavy, dense dip, and thin chips will snap under the weight. You want something that can hold a big scoop without breaking.
Can I make this in a slow cooker instead of the oven?
Yes. Layer it the same way in a small slow cooker and cook on LOW for 2 hours. The top won’t brown, but you can broil it separately for 2–3 minutes if browning matters to you. The layers stay visible if you don’t stir.
Why does my bean dip taste bland?
Canned refried beans are almost always underseasoned. Taste your bean layer before spreading it—it should taste seasoned and a little spiced on its own. If it’s flat, add more cumin, garlic powder, and salt. Don’t rely on the cheese layer to carry all the flavor.
This baked bean dip with cream cheese and sour cream isn’t hard, but it does require attention to one thing: keeping the layers distinct so they stay distinct all the way through to your plate. Chill before baking, don’t overmix the dairy layer, use full-fat sour cream, and bake at 350°F. When you pull it out of the oven and your guests see that cross-section of beans, dairy, and cheese, they’ll know you actually tried. Make this for your next party and report back.
About This Article

Written by Rachel Thompson. Rachel Thompson is a home cook who has spent over 10 years making an unreasonable number of dips, appetizers, and party spreads — no culinary training, just a decade of trial and error and a reputation among friends for always being asked to "bring a dip." She focuses on approachable recipes that combine bold flavors with simple techniques, making entertaining at home accessible to everyone. More about this site.
Scope and limits. Rachel is a home cook with no culinary training. Follow current food safety guidance for holding temperatures and time limits whenever you are serving people other than yourself.
Verify this against a primary source
Specifics change, and your situation may differ from the one described here. These are the authorities worth checking directly:
- FoodSafety.gov — cold holding, hot holding and the two-hour rule
- USDA FoodData Central — ingredient composition and nutrition data
- USDA Food Safety and Inspection Service — safe minimum temperatures and leftovers